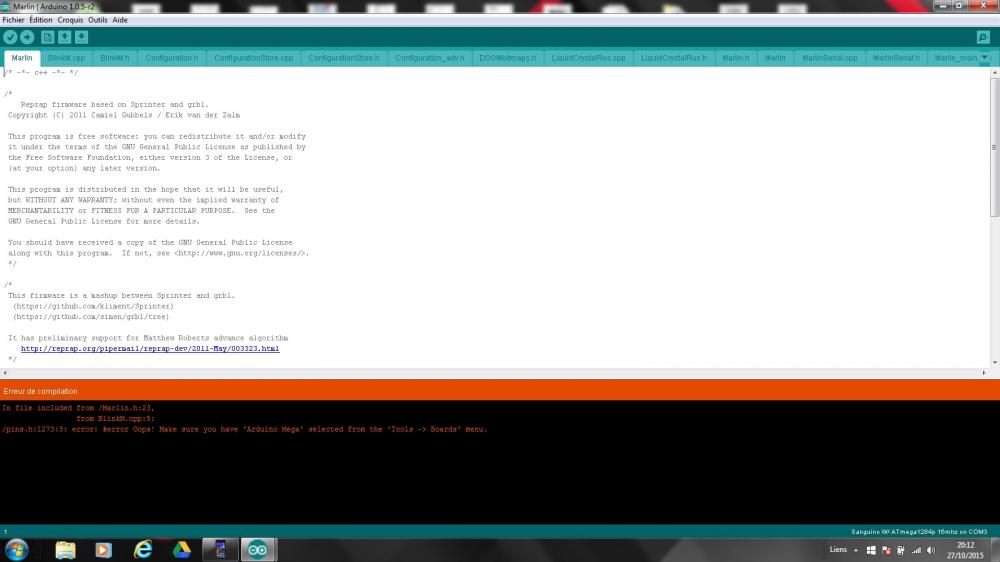
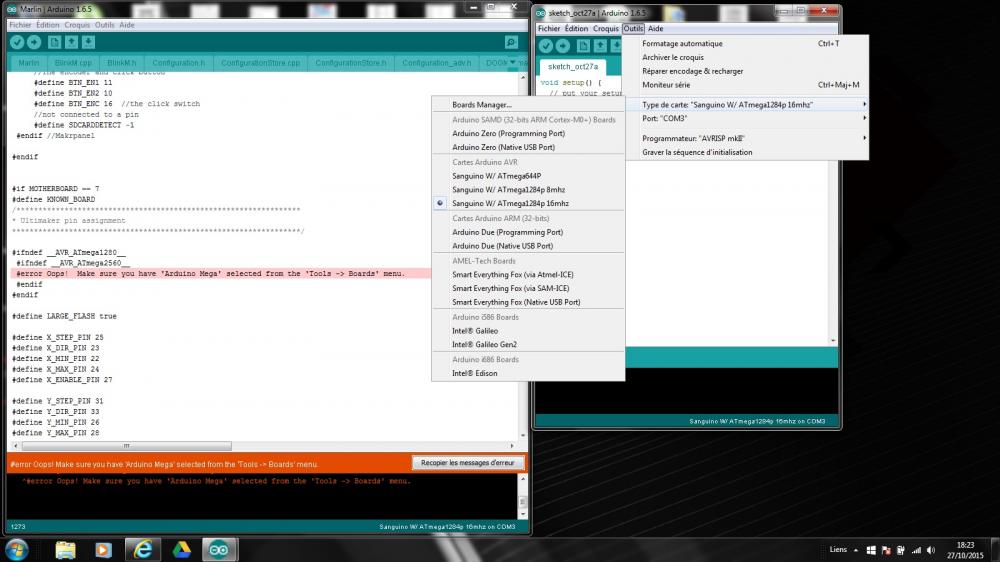
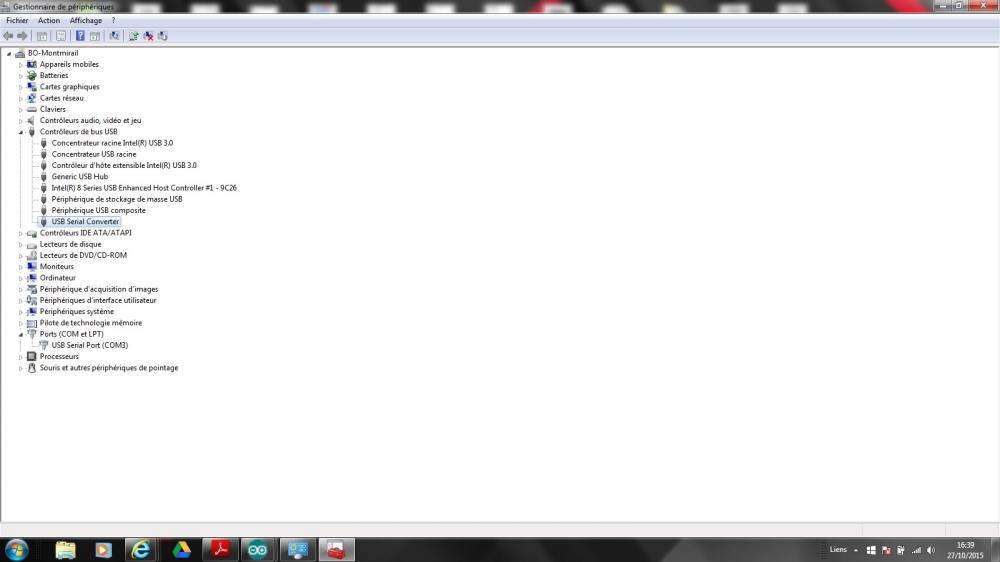
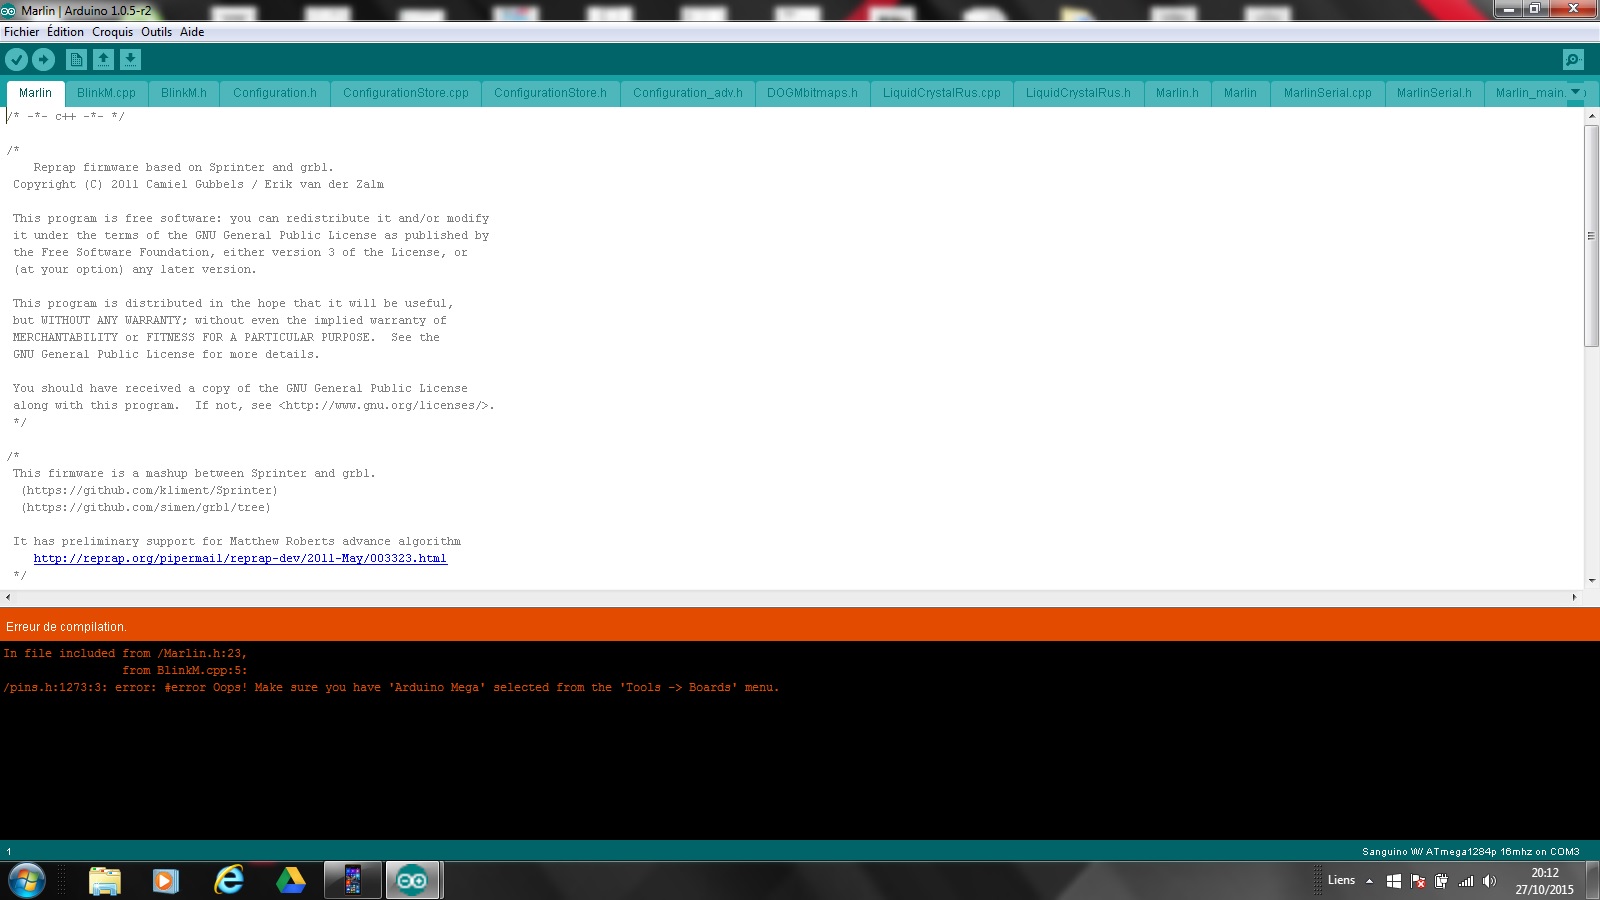
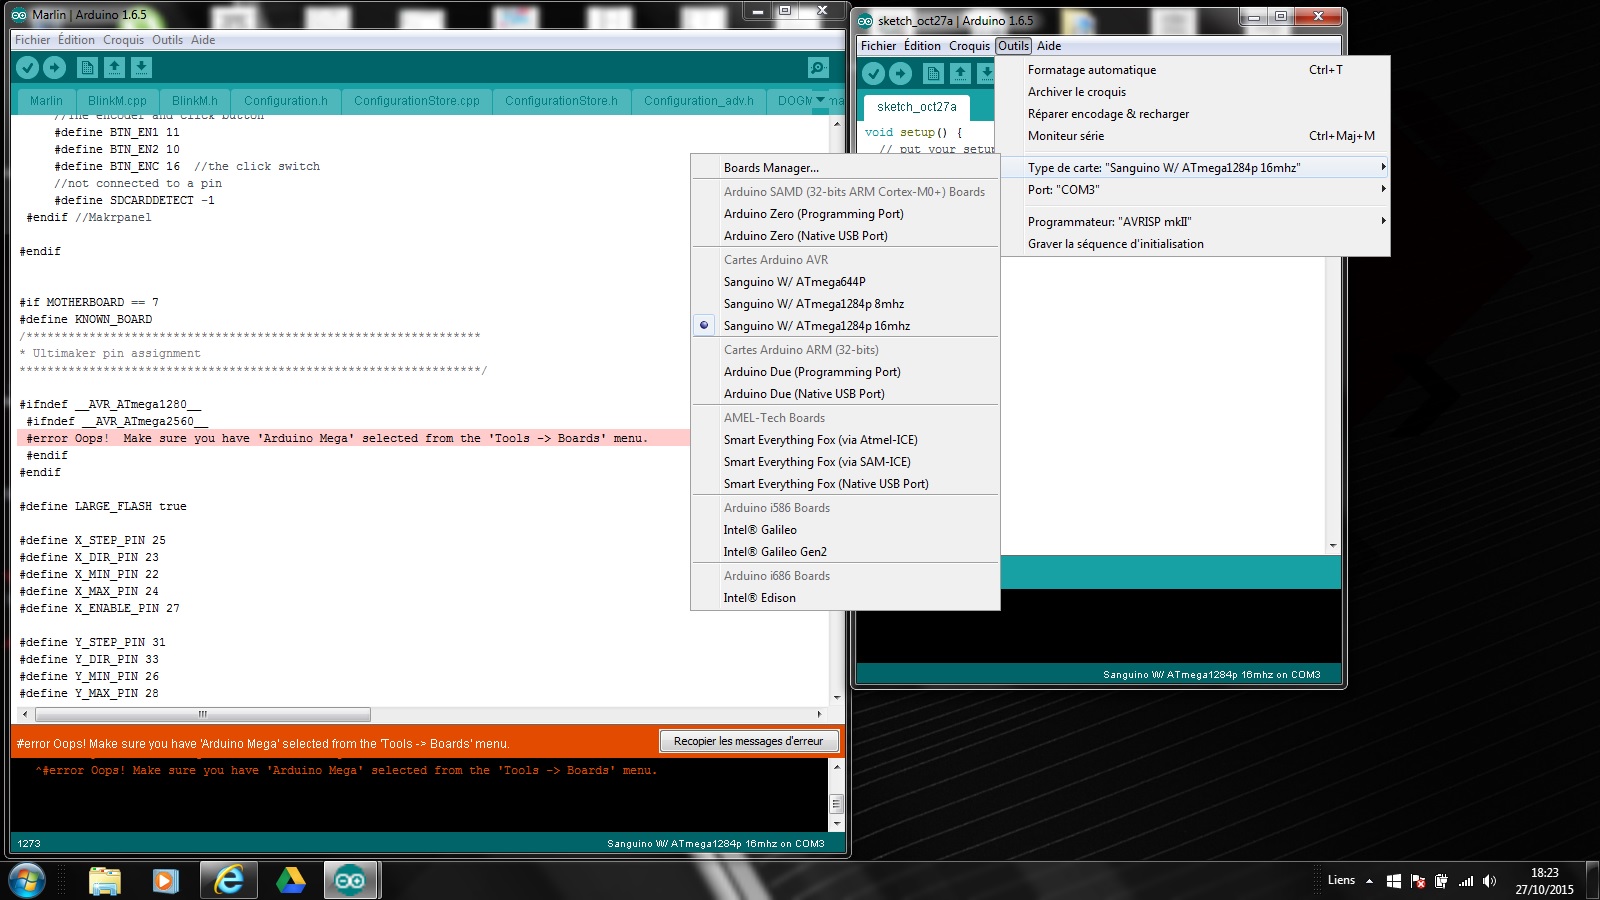
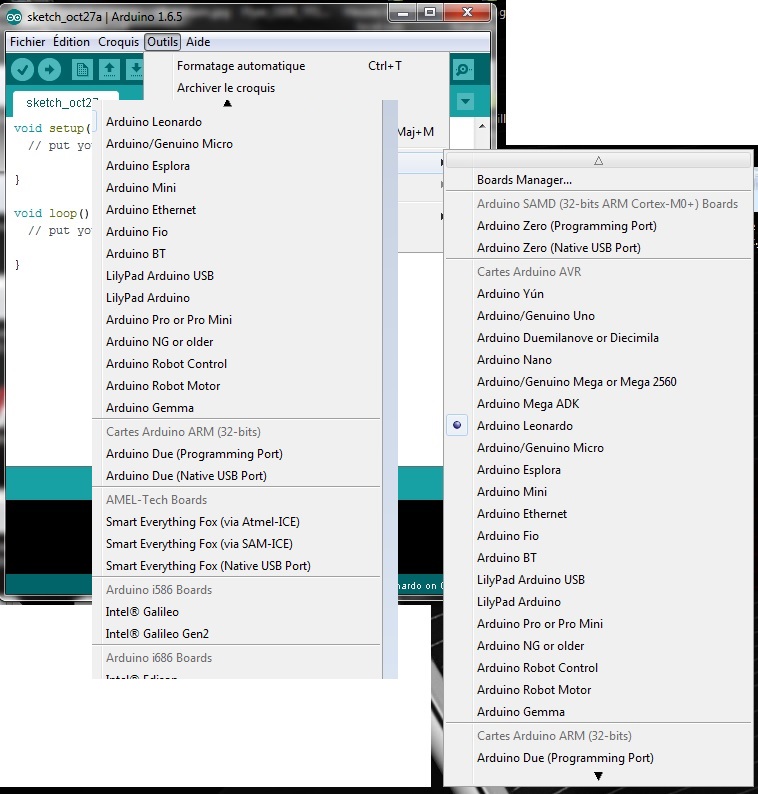
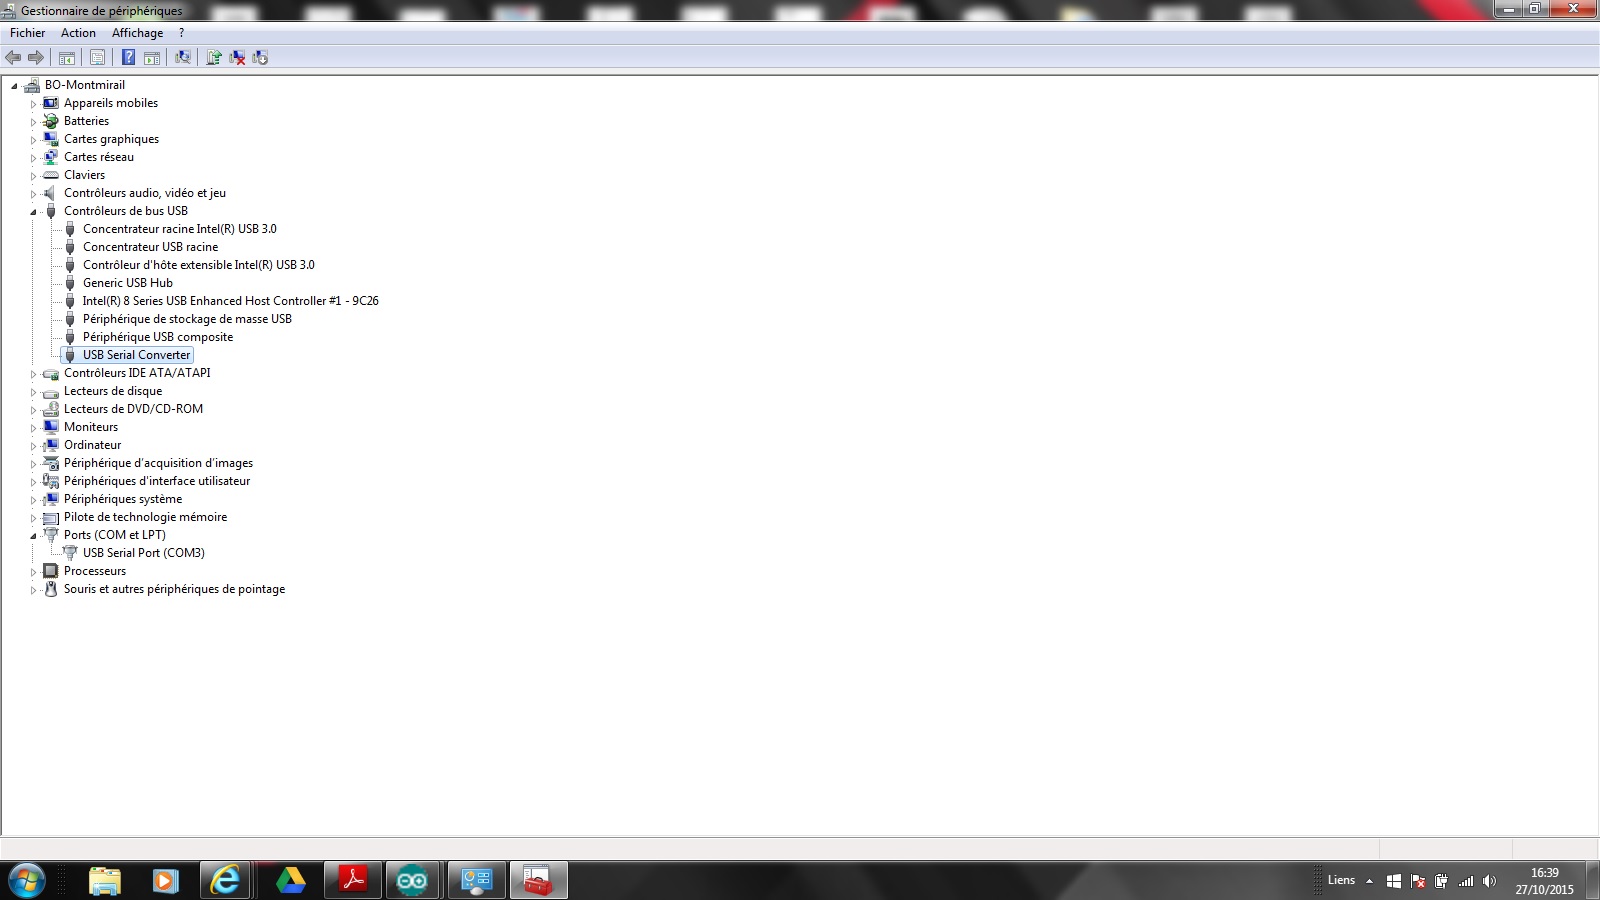
Melzi V2.0From Geeetech Wiki Jump to: navigation, searchContents [hide] 1 Introduction2 Interfaces2.1 Overview and Hardware Resources2.2 Software Resources2.3 Interface Layout2.4 Interface specifications2.5 Jumper Instruction3 Development Environment setting3.1 Interface Connecting and Setting3.2 File Burning3.3 Software Setting4 Get Started5 Extensible Applications6 FAQS7 where to getIntroduction Melzi V2.0 is a compact all-in-one control board which supports only one extruder. Its plug-and-play capability contributes to less time consuming for development and installation. Melzi V2.0 is a quiet mature product with good stability. Melzi 2.0 is based on Arduino Leonardo, so it is more accurate in temperature detection. MelziV2.0 has the following amelioration compared with V1.0: the MOSFET of heatbed and extruder have better capacity of heat dissipation; SD slot adopts outer lead bonding, improving the stability of reading and writing, protecting sd car from damage. When connected to PC, the LED will give prompts for users to know the connection. Features: 1. Operating voltage: 12v 2. Main control IC: ATMEGA1284P from ATMEL 3. FT232RL USB interface 4.4 integrated A4988 stepper motor driver 5.MK1、MK2a、MK2b、MK3 controllable hotbed MK1、MK2a、MK2b、MK3 6. Mini SD card slot that integrates G code files. 7. The integration of 3 MOSFET driver amphenol connectors for hotbed, fan and extruder. InterfacesOverview and Hardware Resources Size :210mm *50mm Weight:70g Software ResourcesCompiling environment: Arduino IDE http://www.geeetech.com/wiki/images/3/36/Arduino-1.0.5-r2-windows.zip Firmware: Marlin http://www.geeetech.com/wiki/images/3/39/Marlin-Marlin_v1.zip Pc software: printrun http://www.geeetech.com/wiki/images/e/e1/Printrun-Win-Slic3r-10Mar2014.zip Repetier-Host http://www.geeetech.com/wiki/images/3/36/SetupRepetierHost_1_00.zip Melzi V2.0 driver: http://www.geeetech.com/wiki/index.php/Sanguinololu Interface Layout Interface specifications1 ADC interfaces for thermometry: one for extruder and another for hotbed. 2 PWM to control extruder, hotbed and fan. 3 end stops for x/y/z axis (mechanical). Jumper Instruction Power supply of logic part: connect 1 and 2 for external power supply; connect 2 and 3 for power supply from USB. Development Environment settingInterface Connecting and Setting File BurningWindows users need install driver before uploading. The board: Tools > Board > sanguino W/ATMEGA1284P 16, as shown below. Configuring serial interface: Tools > Serial Port > the corresponding COM Port of MElzi V2.0 is usually the last one. As shown below Click the check“ ” button to check if it is right and then click the “ ” button to upload firmware, as shown below. Upon uploading, IDE will display the rate of progress; when done uploading appears, the uploading process succeeded. After uploading, you can go on to the next step. If you cannot upload, check the dialog box below to identify the problem and solve it. The common mistakes are the wrong select of type of board or serial port etc. Software SettingArduino IDE Installation Windows will prompt that a new USB device, named FT232R USB UART was found when connecting PS to the PC with USB. Then, windows will open the dialog box “found new hardware wizard”, check “no, not this time”, then click “next” to continue. Check “install from a list or specific location (advanced)”, then click “next”. Specify “drivers” in Arduino 1.0.1 installation directory to install driver. If everything goes well, windows will install the corresponding driver. The graph below shows installation completed. Now, you can find the corresponding Printrboard device in device manager of windows. The connection of Repetier-Host Click configuration > printer setting Set the communication port (the COM port for Melzi V2.0) and the Baud rate. Then click ok Click “connect”> upload. Choose the GCODE file you want to print. Get StartedMelzi V2.0 is the CPU of a 3D printer, manipulating the whole process of printing. Melzi V2.0 can’t be put in use directly without uploading firmware. 1. Firmware uploading- marlin. 2. Setting parameters of the firmware The parameters that need setting are as below, for those not mentioned just leave them as default. #define BAUDRATE 250000
This parameter is for the baud rate of serial port. Note: a successful communication can be realized only when the Baud rate of upper computer is identical with that of Firmware. The Baud rate is not set in random. The common Baud rate are: 2400,9600,19200,38400,57600,115200,250000. The last three are frequently used for 3D Printer. #define MOTHERBOARD 63
This parameter is set for board type. 3D Printer has many types of main board, and the settings of IOs are different, therefore, the parameter has to correspond to the type of your board, or it can’t operate normally. The parameter of Melzi V2.0 should be 63(single- nozzle). For other board, you can refer to the annotation on the board. #define TEMP_SENSOR_0 3
#define TEMP_SENSOR_BED 3
The two parameters are set for the type of temperature sensor respectively. They are the critical parameter to check if the sensor read temperature correctly. The printer can’t operate normally, even has potential risk (damage the device and even worse). You must modify depending on the temperature sensor you use. #define EXTRUDE_MINTEMP 170
This parameter is set to avoid potential risks when the extruder operates before reaching the rated temperature. If you use other 3D Printer, such as printer to make Chocolates, 45℃ is appropriate, so that the parameter configured to a lower value(such as 40℃). const bool X_ENDSTOPS_INVERTING = true;
const bool Y_ENDSTOPS_INVERTING = true;
const bool Z_ENDSTOPS_INVERTING = true.
The three parameters are set for the end stops of three axes. If the configuration is true, the end stop outputs 1 in default condition, and outputs 0 when triggered. That is to say, mechanical end stop should connect to the NO (normally open) contactor. If it is connected to the NC (normally closed), true should be changed to false. #define INVERT_X_DIR false
#define INVERT_Y_DIR true
Mistakes are often made in the above two parameters. The parameters are different for different machinery. In principle, the origin should be at lower-left corner of the print platform (origin: [0, 0]), or at up-right corner (origin: [max, max]). Only in this way will the printing be correct, otherwise, the printing is the mirror image of one axis which is not what expected. #define X_HOME_DIR -1
#define Y_HOME_DIR -1
#define Z_HOME_DIR -1
If the position of the origin is the minimum, the parameter is -1; if it is the maximum, the parameter is 1. #define X_MAX_POS 205
#define X_MIN_POS 0
#define Y_MAX_POS 205
#define Y_MIN_POS 0
#define Z_MAX_POS 200
#define Z_MIN_POS 0
These parameters are crucial to the printing size. Fill in parameters by reference to the coordinate graphs. It is important to note that the origin is not the printing center and the real printing center usually lies at [(x.max - x.min)/2, (y.max -y.min/2)]. The coordinate of central will be used in the slice tool. The printing center’s coordinate must correspond to the parameter configuration, or it will print to the outside of the platform. #define HOMING_FEEDRATE {50*60, 50*60, 4*60, 0}
The parameter means the homing speeds (mm/min). This parameter can be set as default if you use the x-axis and y-axis adopt synchronous belt drive and z-axis adopts screw drive. #define DEFAULT_AXIS_STEPS_PER_UNIT {85.3333, 85.3333, 2560, 158.8308}
These parameters are crucial to the printing size. These parameters indicate the pulse the axis need when operating 1mm. they are corresponding to x, y, z axis and extruder respectively. In most cases these figure should be calculated by yourself, you can refer to: http://calculator.josefprusa.cz/#steppers. So far, the commonest parameters have been configured and the printer can work now. In addition, if the 2004 LCD needs verifying, you should delete the “//” from “//#define REPRAP_DISCOUNT_SMART_CONTROLLER” to ensure the normal working.
Extensible ApplicationsUpload firmware with Bluetooth through USB《-》rs232(TX/RX) The COM should be set as (9600, N, 8, 1) The command for Bluetooth module: AT OK
AT+BAUD8 OK115200BAUD (set baud rate for Melzi)
AT+NAMEHUXLEY OKsetname (optional set name, default: linvor)
AT+PIN0000 OKsetPIN (optional set pin, default: 1234)
Connection: FAQS1. The LED doesn’t light when connected to USB and 5v external power supply. ① LED is broken ② LED is not well welded ③ the power supply doesn’t work. 2. How to solve it if the driver installation failed? Click here to reinstall the driver((http://www.geeetech.com/wiki/index.php/Sanguinololu) 3. What type of printer can Printrboard be applied to? Solidoodle,printrbot,and most type of reprap(with 2 stepper motor drivers for Z axis and single extruder) where to getClick here to buy: melzi V2.0


")